

Table of contents
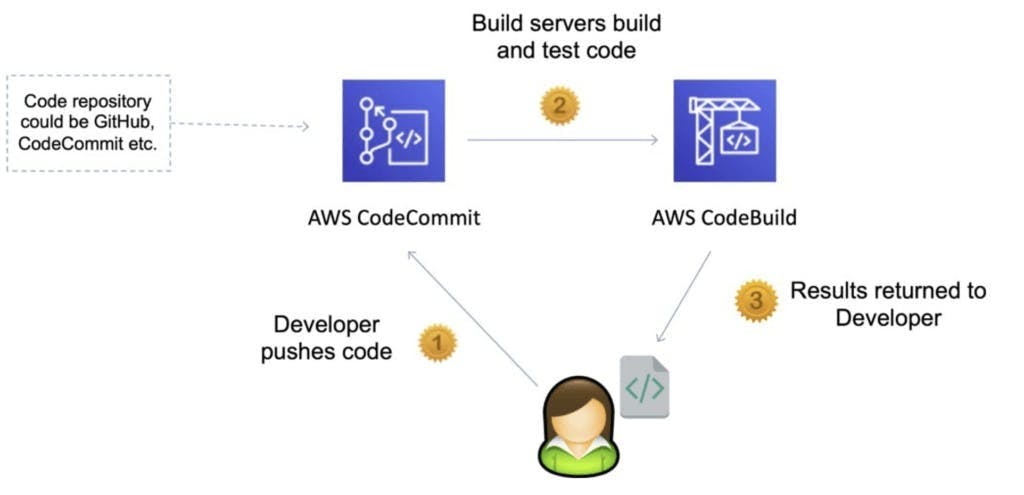
On your journey of making a CI/CD pipeline on AWS with these tools, you completed AWS CodeCommit.
Next few days you'll learn these tools/services:
CodeBuild
CodeDeploy
CodePipeline
S3
What is CodeBuild ?
AWS CodeBuild is a fully managed build service in the cloud. CodeBuild compiles your source code, runs unit tests, and produces artifacts that are ready to deploy. CodeBuild eliminates the need to provision, manage, and scale your own build servers.
Here are some key aspects and features of AWS CodeBuild:
Build Environments: CodeBuild provides pre-configured build environments that support various programming languages and frameworks. These environments include the necessary build tools, compilers, and runtime environments needed to build your code. You can also create custom build environments if needed.
Build Specifications: CodeBuild uses build specifications, which are YAML files that define the build steps, environment settings, and other build configuration details. The build specification file is stored in your source code repository and is used by CodeBuild to execute the build process.
Integration with Source Code Repositories: CodeBuild integrates with popular source code repositories like AWS CodeCommit, GitHub, and Bitbucket. It can automatically trigger builds when changes are pushed to these repositories, enabling continuous integration.
Scalability and Parallel Builds: CodeBuild is designed to scale automatically based on the size and demands of your build workload. It can run multiple builds concurrently, allowing you to speed up build times and handle increased build traffic.
Customizable Build Process: CodeBuild supports a wide range of build scenarios and allows you to customize your build process. You can define build commands, run tests, package artifacts, and perform other tasks specific to your application requirements.
Build Logs and Notifications: CodeBuild provides detailed build logs, which can help troubleshoot build failures and track the progress of your builds. It also supports notifications through Amazon SNS or AWS Chatbot, allowing you to receive notifications about build status changes.
Integration with CI/CD Workflows: CodeBuild integrates seamlessly with other AWS services, such as AWS CodePipeline, to enable end-to-end CI/CD workflows. You can use CodePipeline to orchestrate your build, test, and deployment processes, incorporating CodeBuild as a build step.
Security and IAM Integration: CodeBuild integrates with AWS Identity and Access Management (IAM), providing fine-grained control over user access and permissions. You can define IAM roles and policies to grant CodeBuild the necessary permissions to access AWS resources during the build process.
Benefits of AWS CodeBuild
•Eliminates the need to set up, patch, update, and manage build servers and software
•Scales up and down automatically to meet your build volume
•Never pay for idle build server capacity
•Create complete, automated software release workflows for continuous integration and delivery
•Bring your own build tools and programming runtimes
How AWS CodeBuild Works?
We have a code and that code is in AWS CodeCommit. So we have our source code, a bunch of files, and there is a very important file that lives at the top of your repo, which is buildspec.yml.
Now CodeBuild is going to fetch this code and then CodeBuild itself have a container. So previously as said there is going to be a build environment, So this Container is going to load all the source code in the buildspec.yml .
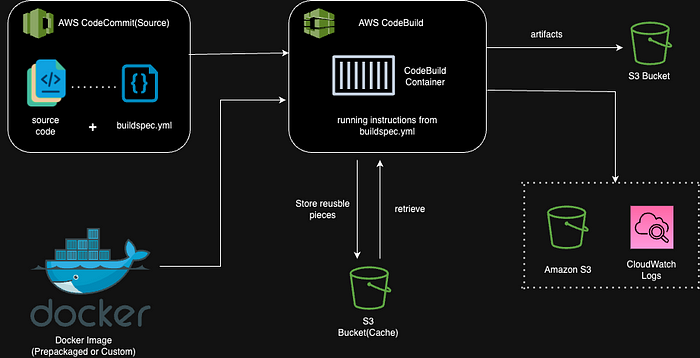
Run all the instructions that are inserted into this buildspec.yml file. Now to build this container CodeBuild will pull a Docker image. So either it is pre-packaged by AWS for the environments or you can provide your own Docker image to run whatever code you need.
So there is a feature in Codebuild to be able to cache a bunch of files in S3 buckets. Then all the logs are going to be into CloudWatch logs and S3 if you enable it.
Then once CodeBuild is done to build your code or test your code, it can produce some artifacts and these artifacts will be extracted out of the container, put into an S3 bucket and this is where you can find your final output of CodeBuild.
Task1:
Read about Buildspec file for Codebuild.
The buildspec file is a YAML or JSON file that defines the build steps and configuration settings for an AWS CodeBuild project. It is stored in your source code repository and is used by CodeBuild to execute the build process. The buildspec file provides instructions on how to build, test, and package your code during the build phase.
Here are some key aspects of the buildspec file:
File Location: The buildspec file should be located in the root directory of your source code repository. CodeBuild looks for this file to determine how to build your code.
YAML or JSON Format: The buildspec file can be written in either YAML or JSON format. YAML is the recommended format due to its readability and ease of use.
Phases and Commands: The buildspec file consists of one or more phases, each containing a sequence of commands. For example, the build phase may include commands to install dependencies, compile code, run tests, and package artifacts. You can define pre-build, build, post-build, and optional phases according to your build requirements.
Artifacts and Cache: You can specify the artifacts that CodeBuild should generate after a successful build, such as compiled binaries or packaged artifacts. Additionally, you can configure caching to improve build performance by storing intermediate build dependencies or other files between builds.
Notifications: The buildspec file can include notifications to inform you about the build status. For example, you can configure CodeBuild to send notifications through Amazon SNS or AWS Chatbot when the build succeeds or fails.
Certainly! Here's an example of a buildspec file in YAML format:
    version: 0.2

    phases:
      install:
        runtime-versions:
          java: openjdk11
        commands:
          - echo "Installing dependencies..."
          - mvn install

      build:
        commands:
          - echo "Building the project..."
          - mvn package

      test:
        commands:
          - echo "Running tests..."
          - mvn test

    artifacts:
      files:
        - target/myapp.jar
      discard-paths: yes

    cache:
      paths:
        - ~/.m2/repository
In this example:
The
versionfield specifies the version of the buildspec file format. In this case, it is set to0.2.The
phasessection defines the different phases of the build process. In this example, there are three phases:install,build, andtest. Each phase contains a set of commands to be executed.In the
installphase, it sets the runtime version of Java to OpenJDK 11 and then runs the installation of dependencies using Maven.In the
buildphase, it builds the project by executing themvn packagecommand.In the
testphase, it runs the tests using themvn testcommand.The
artifactssection specifies the files to be included as build artifacts. In this case, it includes themyapp.jarfile located in thetargetdirectory. Thediscard-pathsoption is set toyes, which means the file paths will be discarded, and only the files themselves will be included in the artifact.The
cachesection defines the paths to be cached between builds. In this example, it caches the Maven repository located at~/.m2/repository.
Create a simple index.html file in CodeCommit Repository
Now, Let's dive into the steps👇
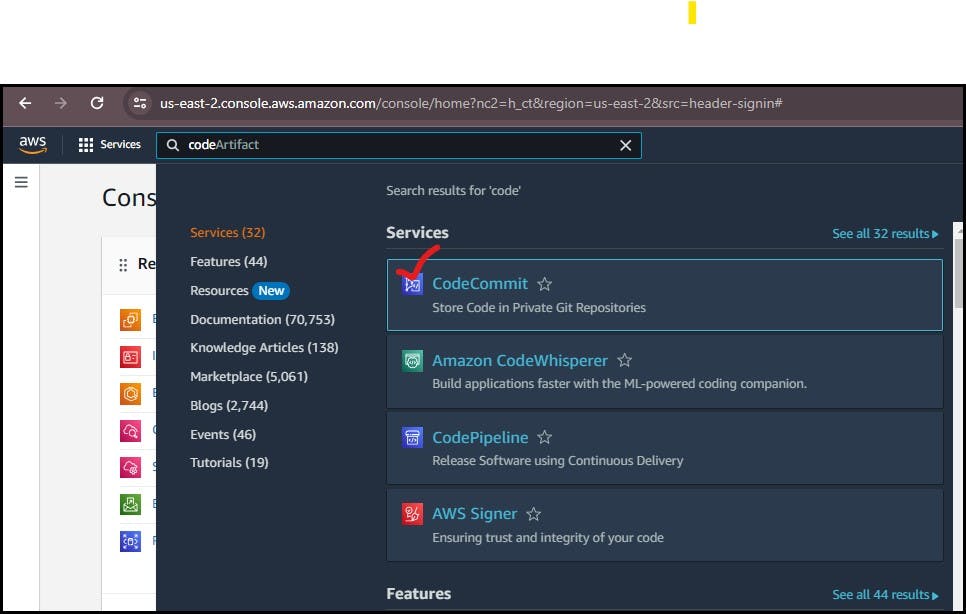
📂Step 1: Login to AWS Console and on Search bar type "CodeCommit".
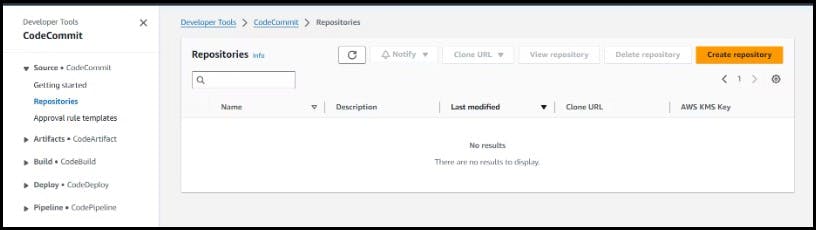
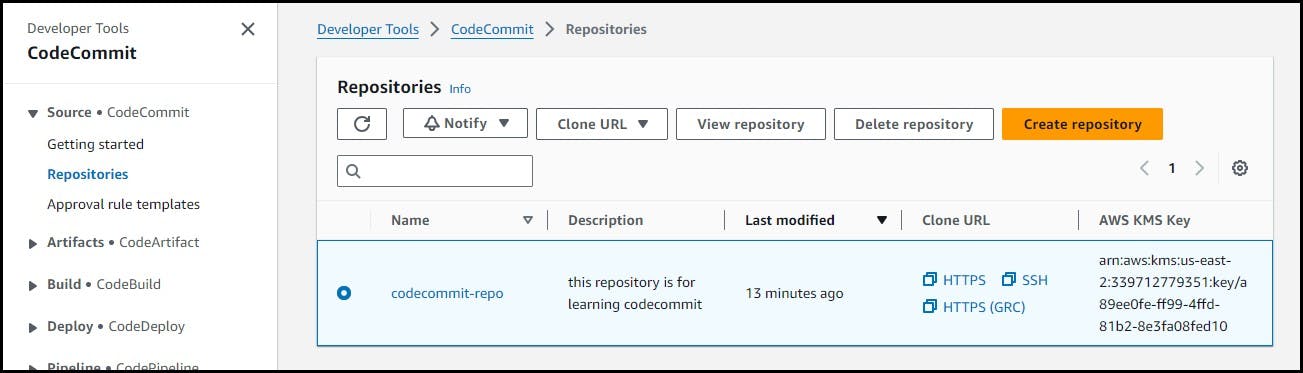
✏Step 2: Go to CodeCommit. Click on "Create repository" and Setup your Code Repository.
📚Step 3: After setting up your CodeCommit Repository. Clone the repository from CodeCommit. In the CodeCommit dashboard, click on HTTPS to copy the URL.
🔎Step4: Clone the CodeCommit repository to your local machine using a Git client and Change your current working directory to the cloned repository.
 git clone <repository-url>

 cd <repository-name>
🛠Step5: Create the index.html file: Use a text editor or command-line tools to create the index.html file. For example, you can use the following command to create the file:
echo "Hello World" > index.html
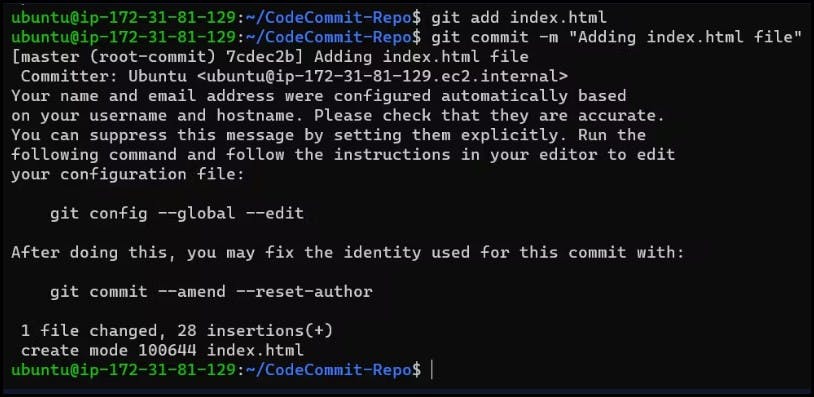
📒Step 6: Add these changes and commit to the repository.
git add index.html
git status
git commit -m "Adding index.html file"
💨Step 7: Let us push these changes to the CodeCommit repository.
git push origin master
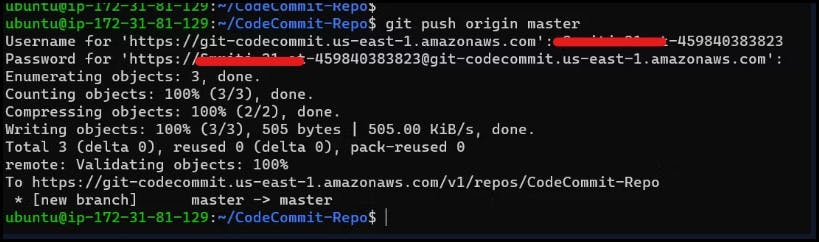
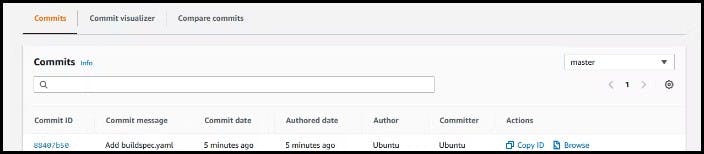
✔Step 8: Verify the same in the CodeCommit on the AWS Console.

Build the index.html using the nginx server
Create a new file named
buildspec.ymlin your local repository with the following content:version: 0.2 phases: pre_build: commands: - echo "starting building" - echo "Installing nginx" - apt-get update - apt-get install -y nginx build: commands: - echo "Copying files to nginx directory" - cp index.html /var/www/html/index.html post_build: commands: - echo "configuring nginx" artifacts: files: - /var/www/html/index.html
Add buildspec.yaml file to CodeCommit Repository and complete the build process.
Commit and push the
buildspec.ymlfile to CodeCommit: Commit thebuildspec.ymlfile to the CodeCommit repository.git add buildspec.yaml git commit -m "Add buildspec.yaml" git push origin masterThis adds the file to the Git repository, commits the changes with a commit message, and pushes them to the
masterbranch of the CodeCommit repository.You have a buildspec.yml and index.html file in your CodeCommit repository
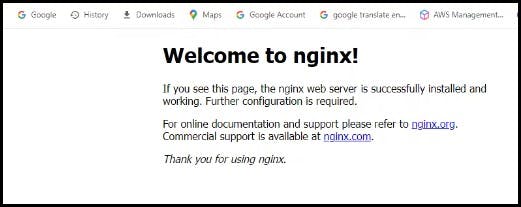
- Copy the public IP in EC2 inastance and paste on browser
Task 2:
Add buildspec.yaml file to CodeCommit Repository and complete the build process.
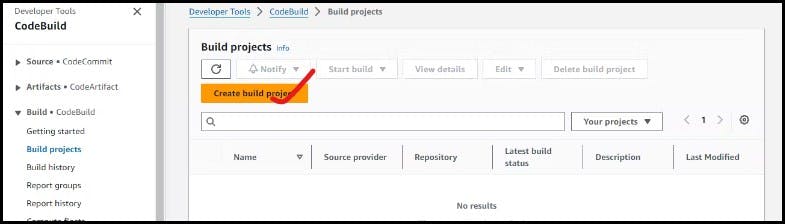
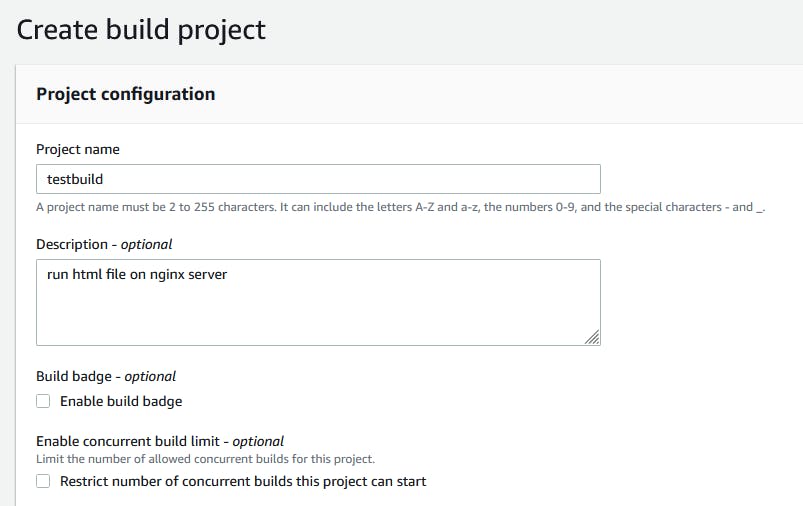
📚Step 1: Go to the CodeBuild service. Click the "Create build project" button.
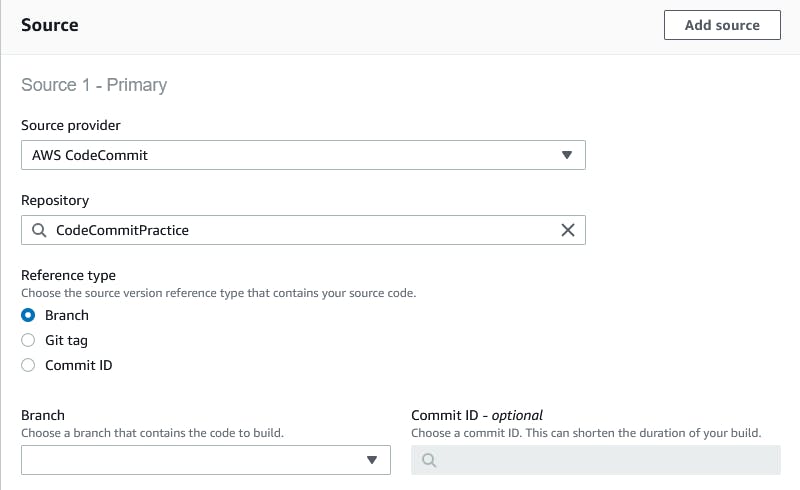
🔑Step2: create a build project and fill as per required(including the project name, source provider (CodeCommit), repository, and branch).
- In the Environment section, choose the operating system, runtime ad image.

🛠Step3: Create a new service role and Under the "Buildspec" section, choose "Use a build spec file".

🖊Step4: Click on "Create build project" to create your project.

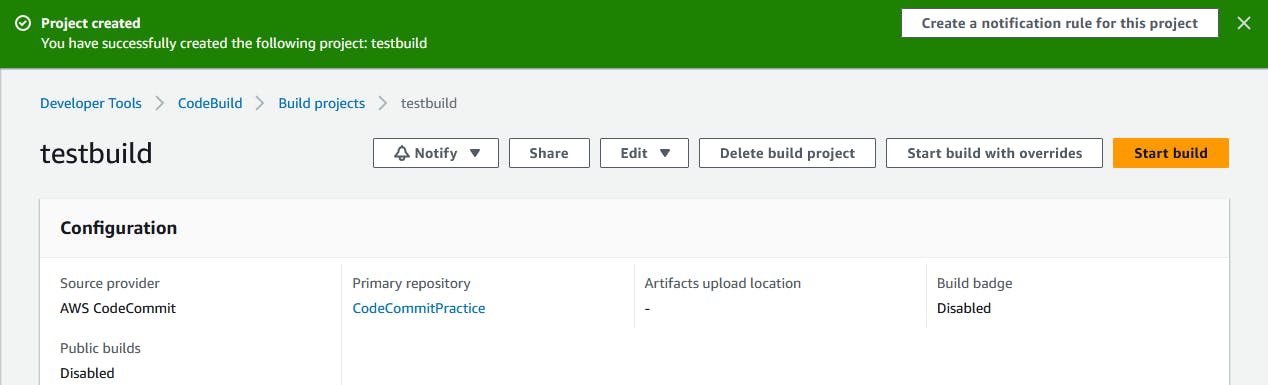
🍀Successfully build project is created.
Click the "Start build" button to start a new build.
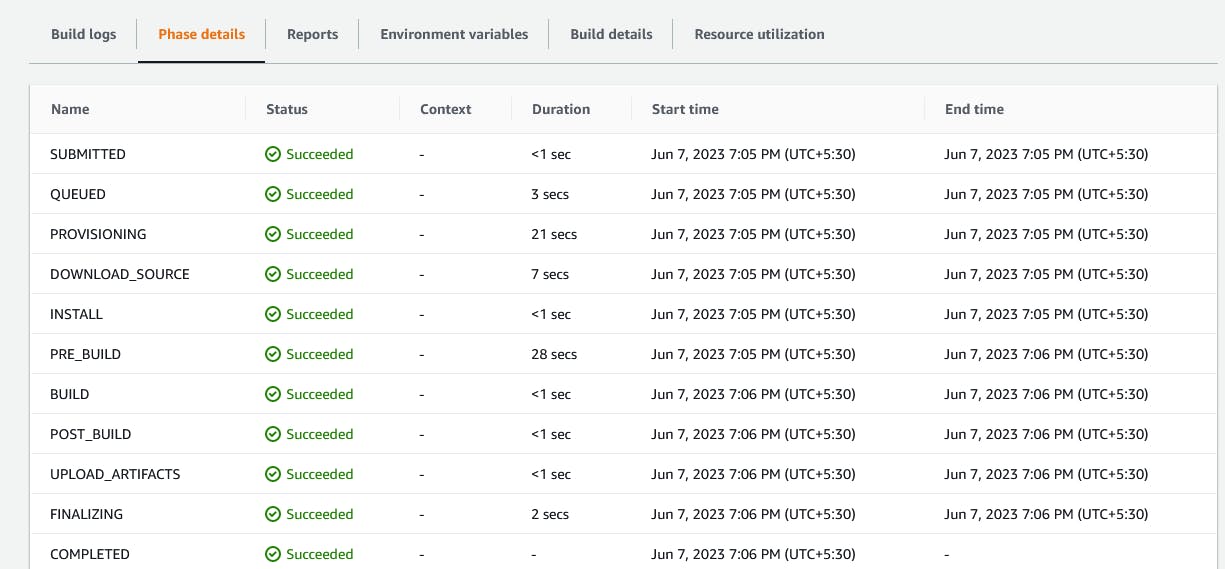
✔Step5: Check the status of the build which is Succeeded.
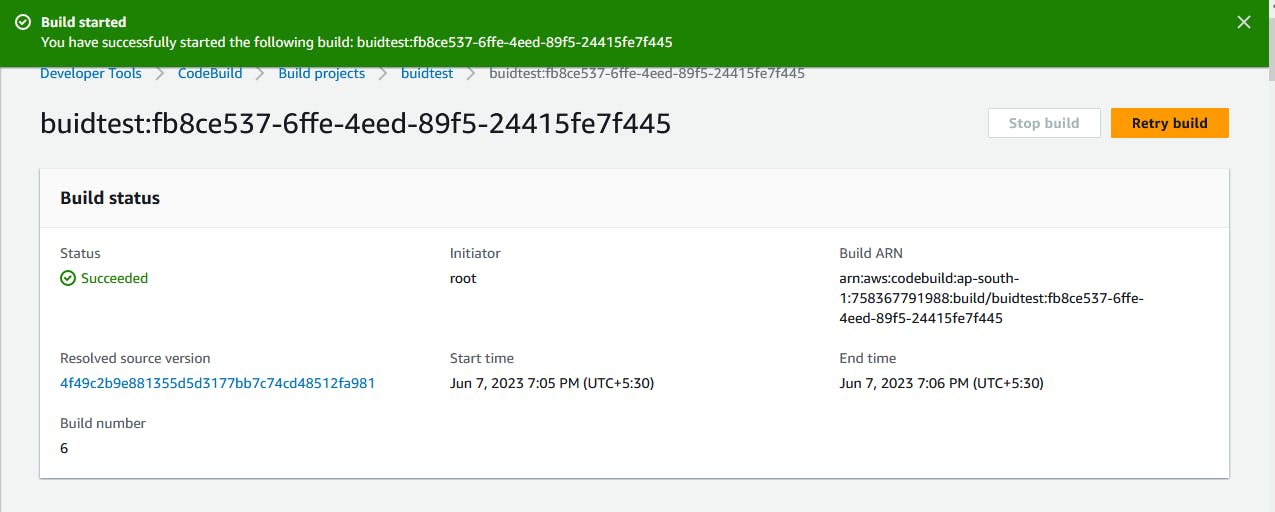
All the phase steps also succeeded.
Conclusion
Overall, AWS CodeBuild simplifies and automates the process of compiling, testing, and packaging your code. It helps you implement CI/CD practices by providing a scalable and managed build service that can be easily integrated into your software development workflows. It’s an excellent solution for managing your build environment.
Thank you 😊😊
Happy Learning!!!!