What is Ansible?
Ansible is an open-source automation tool that enables you to manage and configure computer systems, deploy applications, and orchestrate complex IT tasks. It simplifies the process of automating tasks such as software provisioning, configuration management, and application deployment across a large number of systems. One of the most exciting aspects of Ansible is that it works agent-less unlike most other configuration management solutions. It doesn’t require remote systems with a specific agent or software to make changes or execute commands.
With Ansible, you can define your infrastructure as code using simple, human-readable YAML files called playbooks. Playbooks describe the desired state of your systems and the tasks required to achieve that state. Ansible then connects to the target systems over SSH or other remote protocols and executes the necessary actions to bring them into the desired state.
Some key features of Ansible include:
Agentless Architecture: Ansible does not require any software or agents to be installed on the target systems. It communicates with them using SSH or other remote protocols, making it lightweight and easy to set up.
Declarative Language: Ansible uses a declarative language to describe the desired state of systems. You define what you want the systems to look like, and Ansible figures out the necessary steps to get there.
Idempotent Operations: Ansible ensures that the same playbook can be applied multiple times without causing unintended side effects. If a system is already in the desired state, Ansible skips the associated tasks, which helps in maintaining system consistency.
Extensibility: Ansible provides a robust ecosystem with a wide range of modules that can be used to interact with various systems and services. You can also extend Ansible's functionality by writing custom modules or plugins to suit your specific needs.
Orchestration and Configuration Management: Ansible allows you to orchestrate complex workflows and automate configuration management tasks across multiple systems. It can handle tasks such as package installation, service management, file manipulation, and more.
Benefits of Ansible
Free: Ansible is an open-source tool.
Very simple to set up and use: No special coding skills are necessary to use Ansible’s playbooks (more on playbooks later).
Powerful: Ansible lets you model even highly complex IT workflows.
Flexible: You can orchestrate the entire application environment no matter where it’s deployed. You can also customize it based on your needs.
Efficient: Because you don’t need to install any extra software, there’s more room for application resources on your server.
How does Ansible works?
Ansible works by executing tasks on remote nodes over SSH, allowing it to automate various IT operations, including configuration management, application deployment, and orchestration. Here's an overview of how Ansible works:
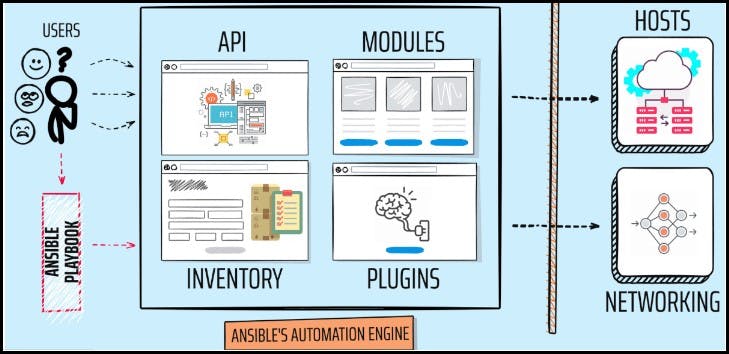
Inventory: Ansible starts by reading an inventory file, which contains a list of managed nodes (servers or devices) and organizes them into groups. The inventory file can be static or dynamic, and it can be in various formats, such as INI or YAML.
API: APIs to enhance Ansible’s connection choices. This covers more than just using SSH for transmission and extends to callbacks and other functionalities. The Ansible APIs serve as a conduit for public and private cloud applications.
Plugins : Plugins are pieces of code that augment Ansible’s core functionality and allow executing Ansible tasks as a job build step. Ansible ships with several handy plugins and one can also write it on their own. For example, Action plugins act as front-ends to modules and can execute tasks on the controller before calling the modules themselves.
Playbooks: Ansible uses YAML-based playbooks to define automation workflows. Playbooks consist of one or more plays, each containing a set of tasks to be executed on specific groups of hosts. Playbooks are human-readable and describe the desired state of systems and applications.
Modules: Ansible executes tasks on remote nodes using modules, which are small pieces of code that perform specific actions. Ansible provides a rich set of built-in modules for tasks such as managing files, installing packages, configuring services, and interacting with cloud providers. Users can also create custom modules to extend Ansible's functionality.
Hosts & Networking: In the Ansible architecture, hosts are the nodal structures that Ansible manages, as well as any computer (RedHat, Linux, Windows, etc.). It leverages a data model unique to the Ansible automation engines and can traverse multiple hardware platforms without any difficulties.
Cloud: A private or public cloud is a collection of distant servers that one may use to collect, organize, and process information. Rather than keeping data on a local server, these systems are hosted over the internet. It simply deploys the cloud resources and instances, links them to the databases, and you’re ready to handle your job remotely.
CMDB : It stands for Configuration Management Database (CMDB). In this, it holds data to a collection of IT assets, and it is a repository or data warehouse where we will store this kind of data, and It also defines the relationships between such assets.
Task1
Installation of Ansible on AWS EC2 (Master Node)
sudo apt-add-repository ppa:ansible/ansiblesudo apt updatesudo apt install ansible
To install Ansible on an AWS EC2 instance (Master Node), you can follow these general steps:
Launch an AWS EC2 instance:
Go to the AWS Management Console and navigate to the EC2 service.
Click on "Launch Instance" to start the instance creation process.
Select an appropriate AMI (Amazon Machine Image) based on your requirements.
Choose the desired instance type, configure other details like security groups, storage, and networking, and launch the instance.
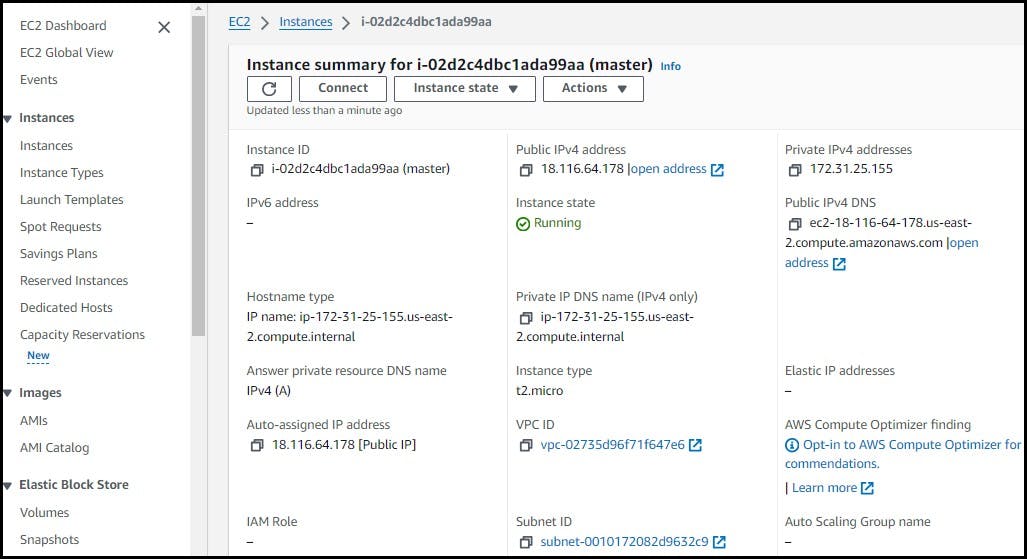
Connect to the EC2 instance:
Once the instance is running, you need to connect to it using SSH.
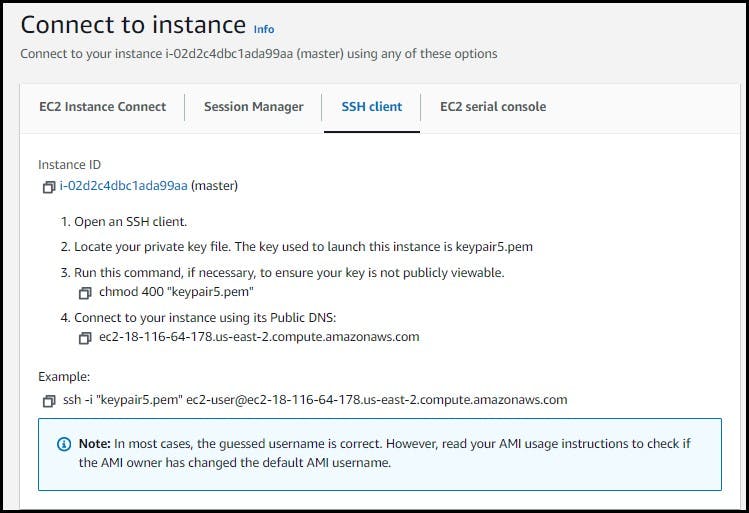
Use a terminal or SSH client to connect to the instance using the SSH key pair associated with the instance. For example:
ssh -i /path/to/key.pem ec2-user@<public-ip-or-dns>
- Add Ansible File:
Once the system is connected add the Ansible repository.
sudo apt-add-repository ppa:ansible/ansible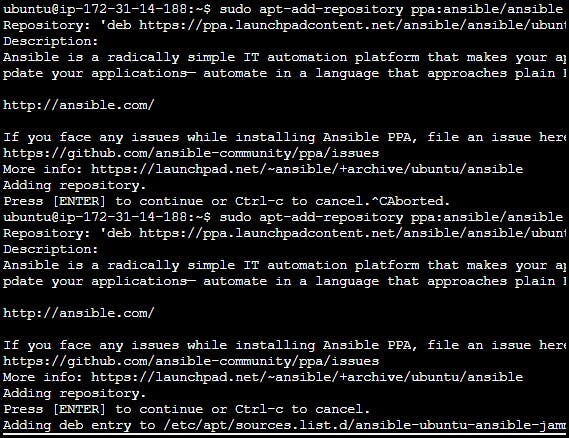
- Update the system to have latest indexes which will have Ansible package.
sudo apt update

- Install Ansible using the command given below-
sudo apt install ansible -y
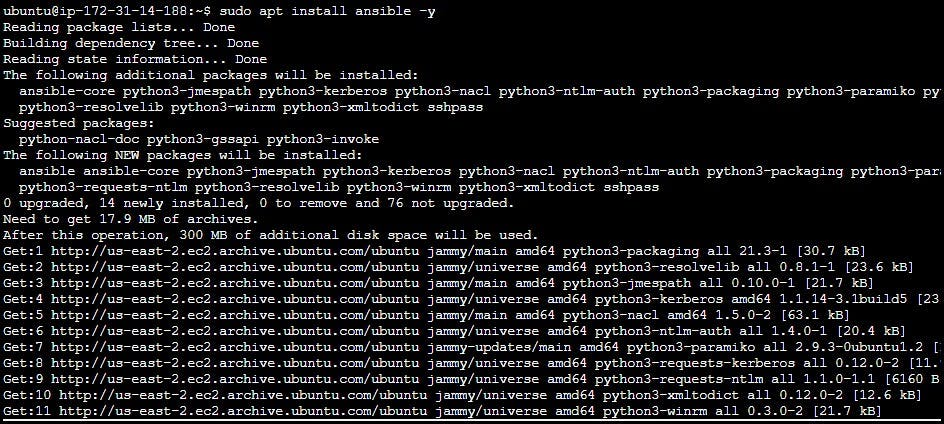
To check the installed Ansible version, use the command given below
ansible --version
Task 2:
Read more about Hosts file:
In Ansible, the Hosts file is used to define the inventory of hosts that Ansible can manage. It is a text file that lists the target hosts or groups of hosts on which Ansible can run tasks and playbooks.
Location: The default location for the hosts file is
/etc/ansible/hosts. However, we can specify a different location by using the-ioption when running Ansible commands.Syntax: The hosts file uses an INI file format, consisting of groups and host entries. Here is a simple example:
    [web_servers]
    web1.example.com
    web2.example.com

    [database_servers]
    db1.example.com
In this example, there are two groups, "web_servers" and "database_servers," each containing a list of hostnames.
Groups: Groups are used to organize hosts logically. We can have multiple hosts belonging to a group. Groups can also be nested, allowing you to create hierarchies.
    [all:vars]
    ansible_user=myuser
    ansible_ssh_private_key_file=/path/to/private/key.pem

    [web_servers]
    web1.example.com
    web2.example.com

    [database_servers]
    db1.example.com
In this example, the
[all:vars]section sets variables that apply to all hosts. This is a way to define common variables for all hosts in one place.Variables: Apart from group-specific variables, we can set host-specific variables in the hosts file:
    [web_servers]
    web1.example.com ansible_user=webuser ansible_port=22
    web2.example.com ansible_user=webuser ansible_port=22
Here,
ansible_userandansible_portare host-specific variables.Patterns: Ansible supports patterns to select hosts dynamically. For example, we can use wildcard patterns or regular expressions to target specific groups or hosts.
    [webservers]
    web-[01:50].example.com

    [databaseservers]
    db-[a:c].example.com
In this example, the patterns specify ranges for hostnames.
Dynamic Inventory: Instead of a static INI file, Ansible can use dynamic inventory scripts that fetch information from external sources like cloud providers, databases, or other systems.
ansible -i /path/to/dynamic_inventory_script.py all -m pingThis command uses a dynamic inventory script to fetch the list of hosts.
The Hosts file can also include additional information such as SSH port, remote user, SSH private key, etc. You can refer to the Ansible documentation for more advanced options and features related to the Hosts file and inventory management in Ansible.
Task3:
Setup two more EC2 instances with same Private keys as the previous instance:
To set up two more EC2 instances with the same private keys as the previous instance, you can follow these general steps:
Launch the EC2 instances:
Go to the AWS Management Console and navigate to the EC2 service.
Click on "Launch Instance" to start the instance creation wizard.
Select an appropriate AMI (Amazon Machine Image) for your instances.
Choose the instance type, network settings, and other configuration options.
In the "Configure Instance" step, select the same key pair used for the previous instance under the "Key pair" section.

We are using Ubuntu as our AMI
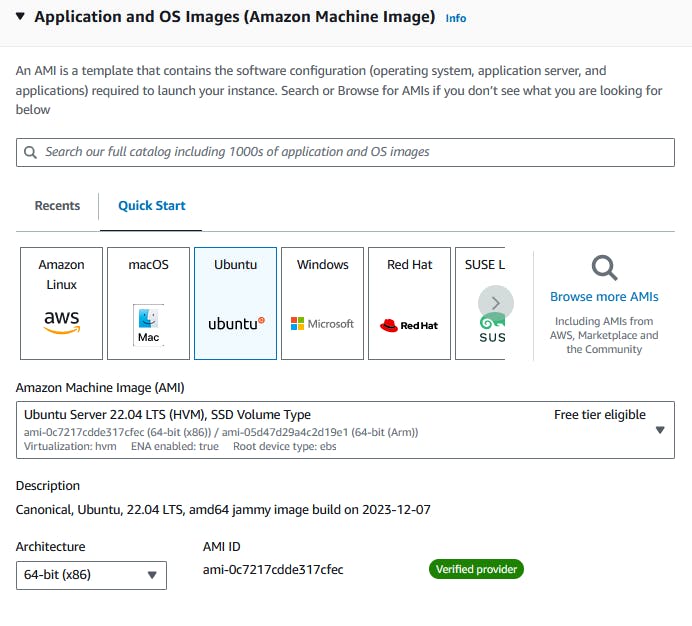
Complete the instance launch process by following the remaining steps, such as configuring storage, adding tags, and setting up security groups.
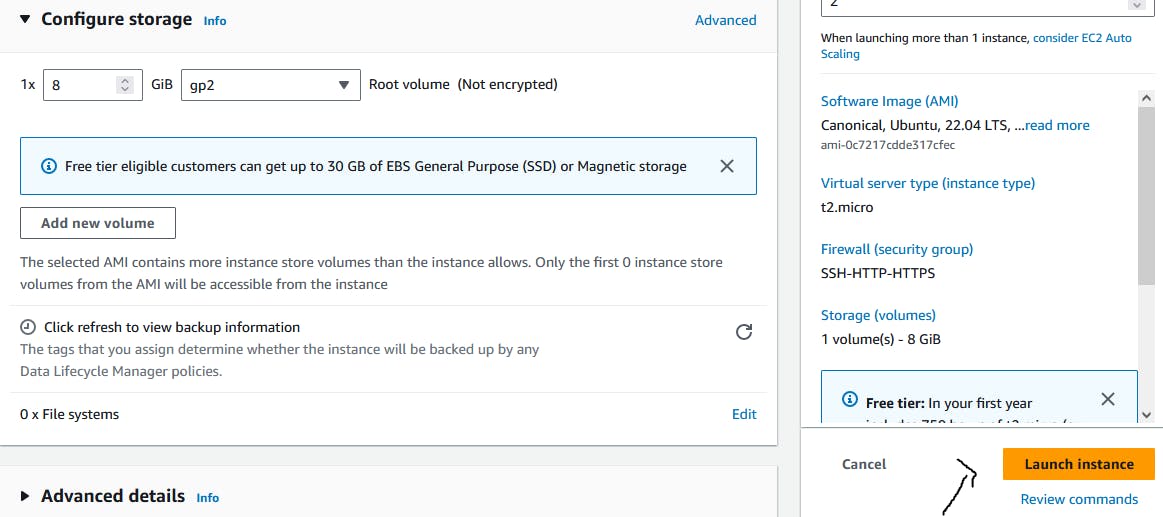
We can verify its status on EC2 dashboard page as shown below

Copy the private key to master server where Ansible is setup:
In this task, we will copy the private key from local machine (Downloaded during instance creation) to the Ansible-Server.
Note: This is a common key for all the instances here.
Use the command given below to copy the private key from local machine to the Ansible-Server
scp -i "test-key.pem" test-key.pem <remote-machine-dns>:/home/ubuntu/.ssh/
Once it is copied, go to "Ansible-Server" instance and navigate to "/home/ubuntu/.ssh/" directory. Long list to see this file.
  cd .ssh
  ls
Try a ping command using ansible to the Nodes:
In this task, we will configure the nodes which we created earlier inside Ansibe hosts file and will do a ping test to check the connectivity and workability on target remote machines.
Go to AWS EC2 dashboard & select the "Node 1". Copy its public IP.

Similarly select the "Node 2". Copy its public IP.

Open Ansible hosts file in vi/vim editor using path "/etc/ansible/hosts".
vim /etc/ansible/hostsWe are creating a group called "webservers". Now mention both the nodes as shown & mention their public IP which we copied earlier.
We will create another groups for variables for all such groups. and we will specify some important variables with their values, such as andible_user, private key file etc.
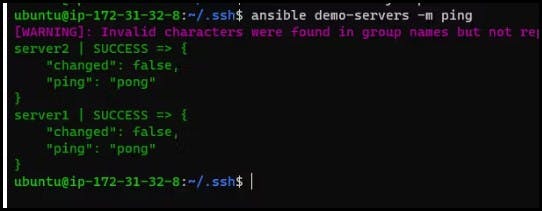
- Now, we will use ping command to test the connectivity and workability on target remote machines.
ansible <group name> -m ping
Thank you for 📖reading my blog, 👍Like it and share it 🔄 with your friends.
Happy learning😊😊
