

By this time you have created multiple EC2 instances, and post installation manually installed applications like Jenkins, docker etc.
Now let's switch to little automation part. Sounds interesting??🤯
☁️AWS:
Amazon Web Services is one of the most popular Cloud Provider that has free tier too for students and Cloud enthusiasts for their Hands-on while learning (Create your free account today to explore more on it).
You can read more about it from here
🔑User Data in AWS
In AWS (Amazon Web Services), User Data refers to a script or set of instructions that can be provided to an Amazon EC2 (Elastic Compute Cloud) instance during its launch. This user data script is executed automatically when the instance starts up, allowing you to configure the instance or perform specific tasks.
Here are some key points about user data in AWS:
Purpose: Userdata is primarily used to automate the initial configuration of EC2 instances. It allows you to run scripts or commands that install software, configure settings, download files, or perform any other necessary setup steps.
Execution: When an EC2 instance is launched with userdata, the script is retrieved by the instance's operating system and executed as part of the initialization process. The execution can happen once during the initial launch or every time the instance reboots, depending on your configuration.
Metadata: Within the userdata script, you can also make use of instance metadata, which provides information about the instance itself, such as its instance ID, availability zone, or public IP address. This metadata can be accessed by querying a well-known endpoint from within the script.
Automation: Userdata enables automation and can be combined with other AWS services. For example, you can use it to automatically configure EC2 instances to join an Auto Scaling group, register with an Elastic Load Balancer, or connect to an AWS Systems Manager for further configuration management.
Troubleshooting: If you encounter issues with userdata execution, you can check the EC2 instance's console output or logs to identify any error messages or problems that occurred during the startup process.
- To read more about User Data.
IAM:
AWS Identity and Access Management (IAM) is a web service that helps you securely control access to AWS resources. With IAM, you can centrally manage permissions that control which AWS resources users can access. You use IAM to control who is authenticated (signed in) and authorized (has permissions) to use resources.
You can read more about it IAM .
Task 1:
Launch EC2 Instance with Pre-installed Jenkins and Verify Accessibility
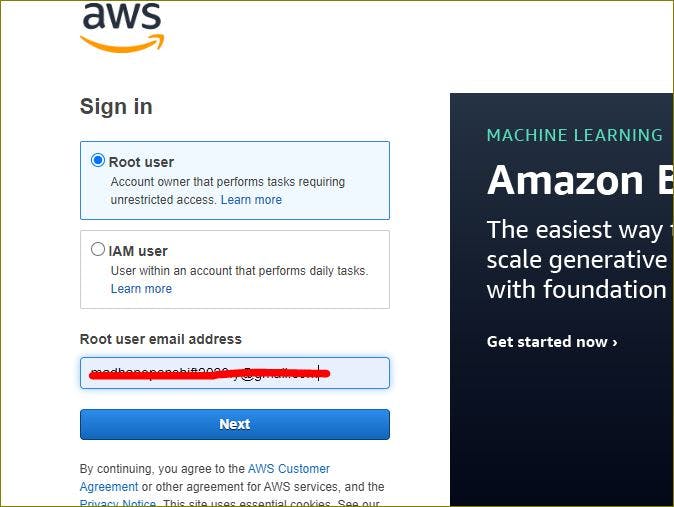
Step 1: Log in to AWS Console
Log in to your AWS Management Console using your AWS account credentials.
Step 2: Launch EC2 Instance
Go to the EC2 Dashboard.

Step3: Click on the "Launch Instance" button.

Step4: Name the Instance and Choose an Amazon Machine Image (AMI)

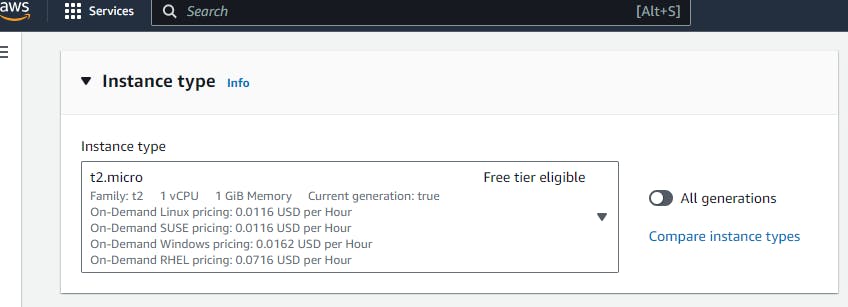
Step5: Select the instance type that meets your requirements. For example, you can choose an instance type like t2.micro if you're just testing or a larger instance type for production use
Step6: create a new keypair

Step 7: Add Storage and configure your security groups
Configure the storage size and type for your EC2 instance. Ensure it has enough space for Jenkins and your projects
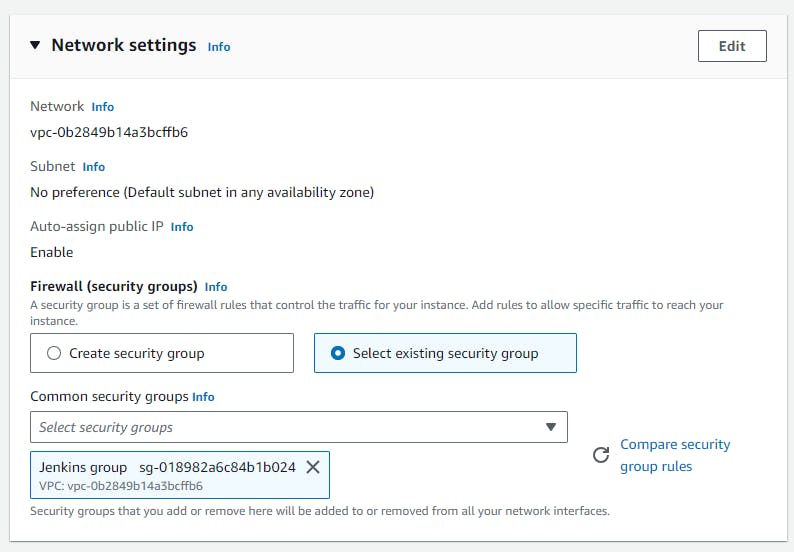
Create or select a security group that allows incoming traffic on port 8080 (default Jenkins port) so you can access Jenkins via the web browser.

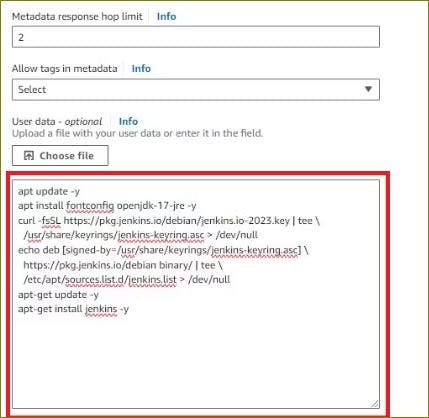
Step 8: Configure User Data
In the "Configure Instance" step, scroll down to the "Advanced Details" section.
In the "User data" field, paste the script that installs Jenkins and any other necessary configurations.
Step 9: Click "Launch Instances" to create the EC2 instance. Wait for the instance to be created and initialized. You can monitor the progress in the EC2 Dashboard.

Step 10: Access Jenkins in Browser
Open a web browser and enter the public IP address of your EC2 instance followed by ":8080" (e.g., http://public_ip:8080) to access the Jenkins web interface

Task2:
Read more on IAM Roles and explain the IAM Users, Groups and Roles in your own terms.
IAM:
📌 Identity and Access Management enables you to manage access to AWS services and resources in a very secure manner. It is used to set users, permissions, and roles. With the help of the IAM service, an organization can create multiple users, each with its own credentials and the user is only able to access the services that are assigned to him/her. IAM is a feature of your AWS account offered at no additional charge.
🔎Why do we need IAM?
By default, the root account user has access to all resources for all AWS services.
Now what is a root user or account, how it is different from IAM users?
A root account is an account through which you have signed up providing your card and billing details. IAM user accounts are user accounts that you can create for individual services offered by AWS.
Assume that you are the head of an organization and there is a team of 10 persons in your organization that work on some projects and deploying them in AWS.
You obviously don't want to give your root account credentials to your developers or DevOps and ask them to deploy apps.
So, the main purpose of IAM is to manage AWS user identities. IAM is used to control who is authentication(signed in) and authorized(has permission) to use resources and services.
🧐IAM Identities
An IAM identity represents a user, user groups and roles, and can be authenticated and then authorized to perform actions in AWS. IAM identity can be associated with one or more policies.
Policies is an object that, when associated with a user or user groups or roles, defines their permissions.

🧐 IAM Users
AWS IAM User is an entity that you create in the AWS account to represent the person that uses it to interact with AWS. It allows the account holder (user) to execute certain tasks in AWS. A user is made up of a name, password for the AWS Management Console and access keys to use with the API or CLI.

🧐 IAM User groups
The User group is a collection of IAM users. It let you to assign permissions for multiple users, which can make it easier to manage the permissions for those users. So, the users that require the same permissions can be grouped together. A user group can contain many users, and these users can also belong to multiple user groups. Changes made to a group are reflected to all users within that group.

🧐 IAM Roles
"An IAM role is an IAM identity that you can create in your account that has specific permissions." It is not uniquely associated with a single person; it can be used by anyone who needs it. A role does not have any security credential l, i.e., username password or security key. It can be used to grant access to the AWS resources, services IAM users, third parties, federated Users etc.
Create three Roles named: DevOps-User, Test-User and Admin:
Step 1: Log in to AWS Console
Open your web browser and navigate to the AWS Management Console (aws.amazon.com).
Log in with your AWS account credentials.
Step 2: Access the IAM Dashboard
From the AWS Management Console, click on the "Services" menu and select "IAM" under the "Security, Identity, & Compliance" section.

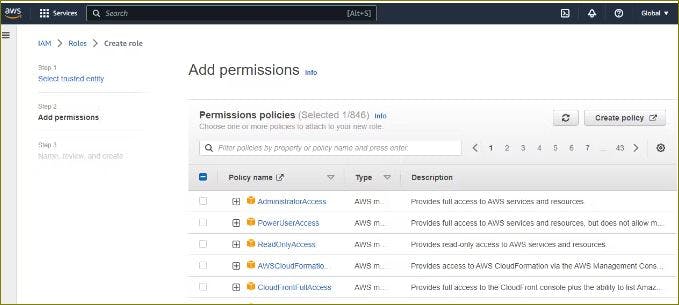
Step3: Create a IAM Role:

Step4: Choose the appropriate use case for the role. For example, if you want to create a role for an EC2 instance, choose "AWS service" and then "EC2".

Step5: Select the appropriate permissions policies for the role. You can choose from existing policies or create a custom policy
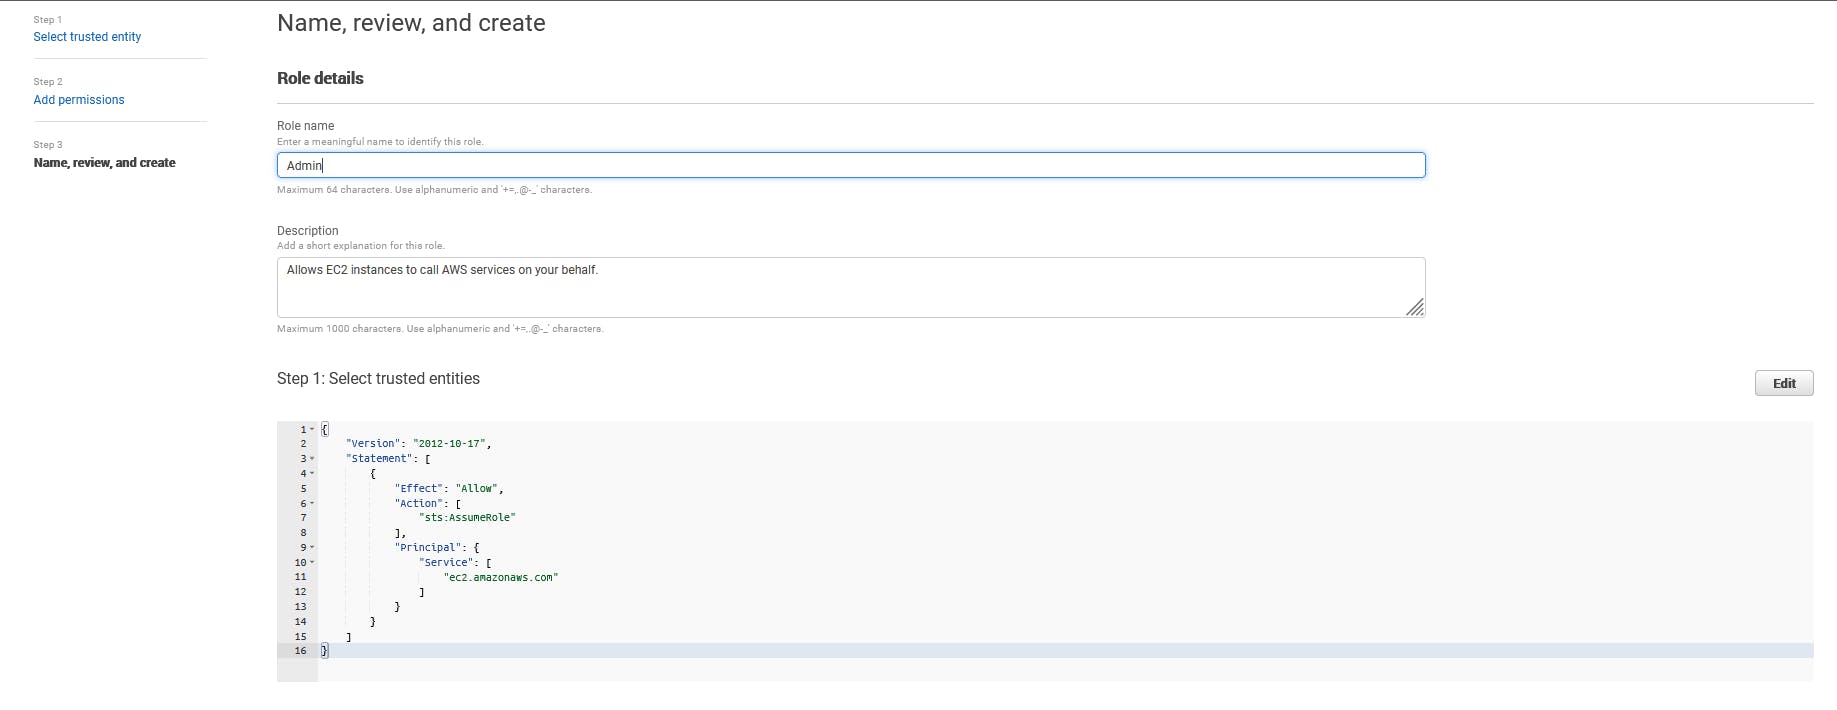
Step6: Create a name and description for the role, such as "DevOps-User."

Step6a: Create the Test-User Role
Follow the same steps as above to create a Test-User role, but this time, customize the name and permissions to align with the needs of your Test-User role.

Step 6b: Create the Admin Role
Follow the same steps as above to create an Admin role, but customize the name and permissions to align with the needs of your Admin role. Admin roles typically have more extensive permissions for managing AWS resources.
Step 7: Verify and Review Roles
After creating all three roles, review the list of roles in the IAM Dashboard to ensure that DevOps-User, Test-User, and Admin have been successfully created with their respective permissions.
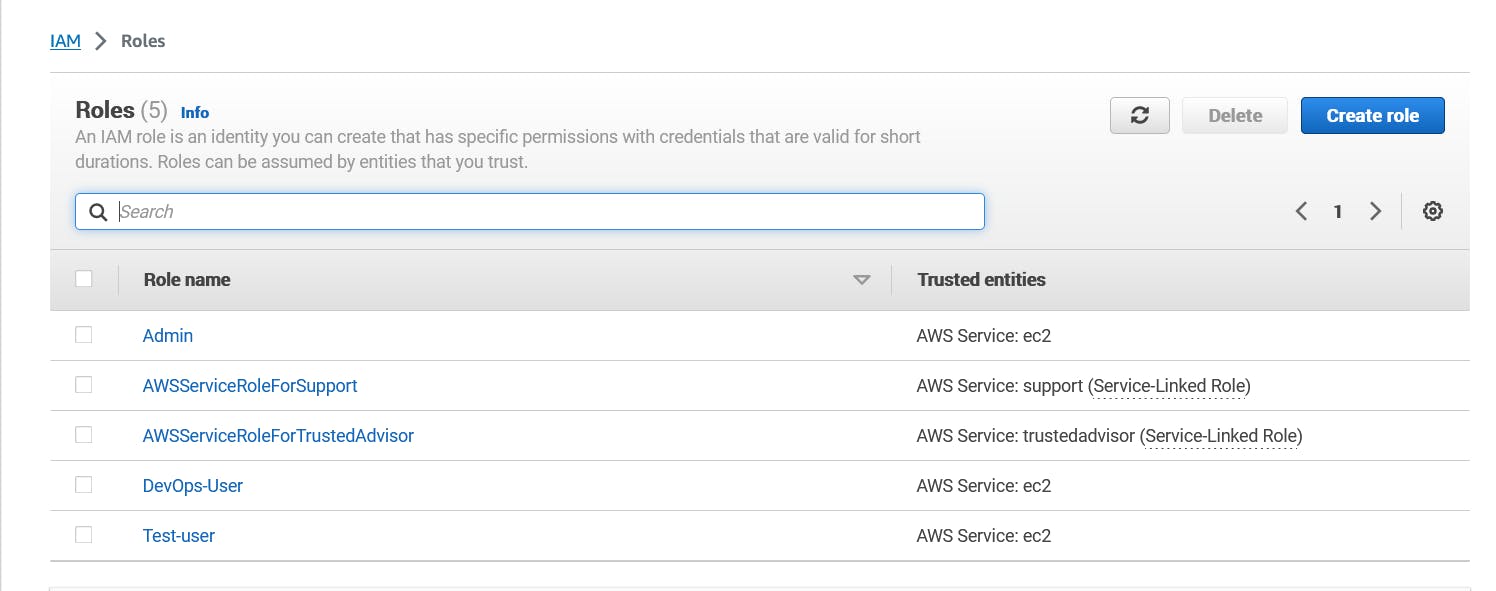
You have now successfully created three IAM roles: DevOps-User, Test-User, and Admin. Each of these roles can be associated with specific AWS resources or users, allowing fine-grained access control within your AWS environment.
✨Congratulations !! Successfully created all three User roles.
A thorough understanding of IAM-users, IAM-roles, and AWS. We will delve deeper into AWS in our next article/blog.
Thank you for 📖reading my blog, 👍Like it and share it 🔄 with your friends.
Happy learning😊😊
###