What is Load Balancer?
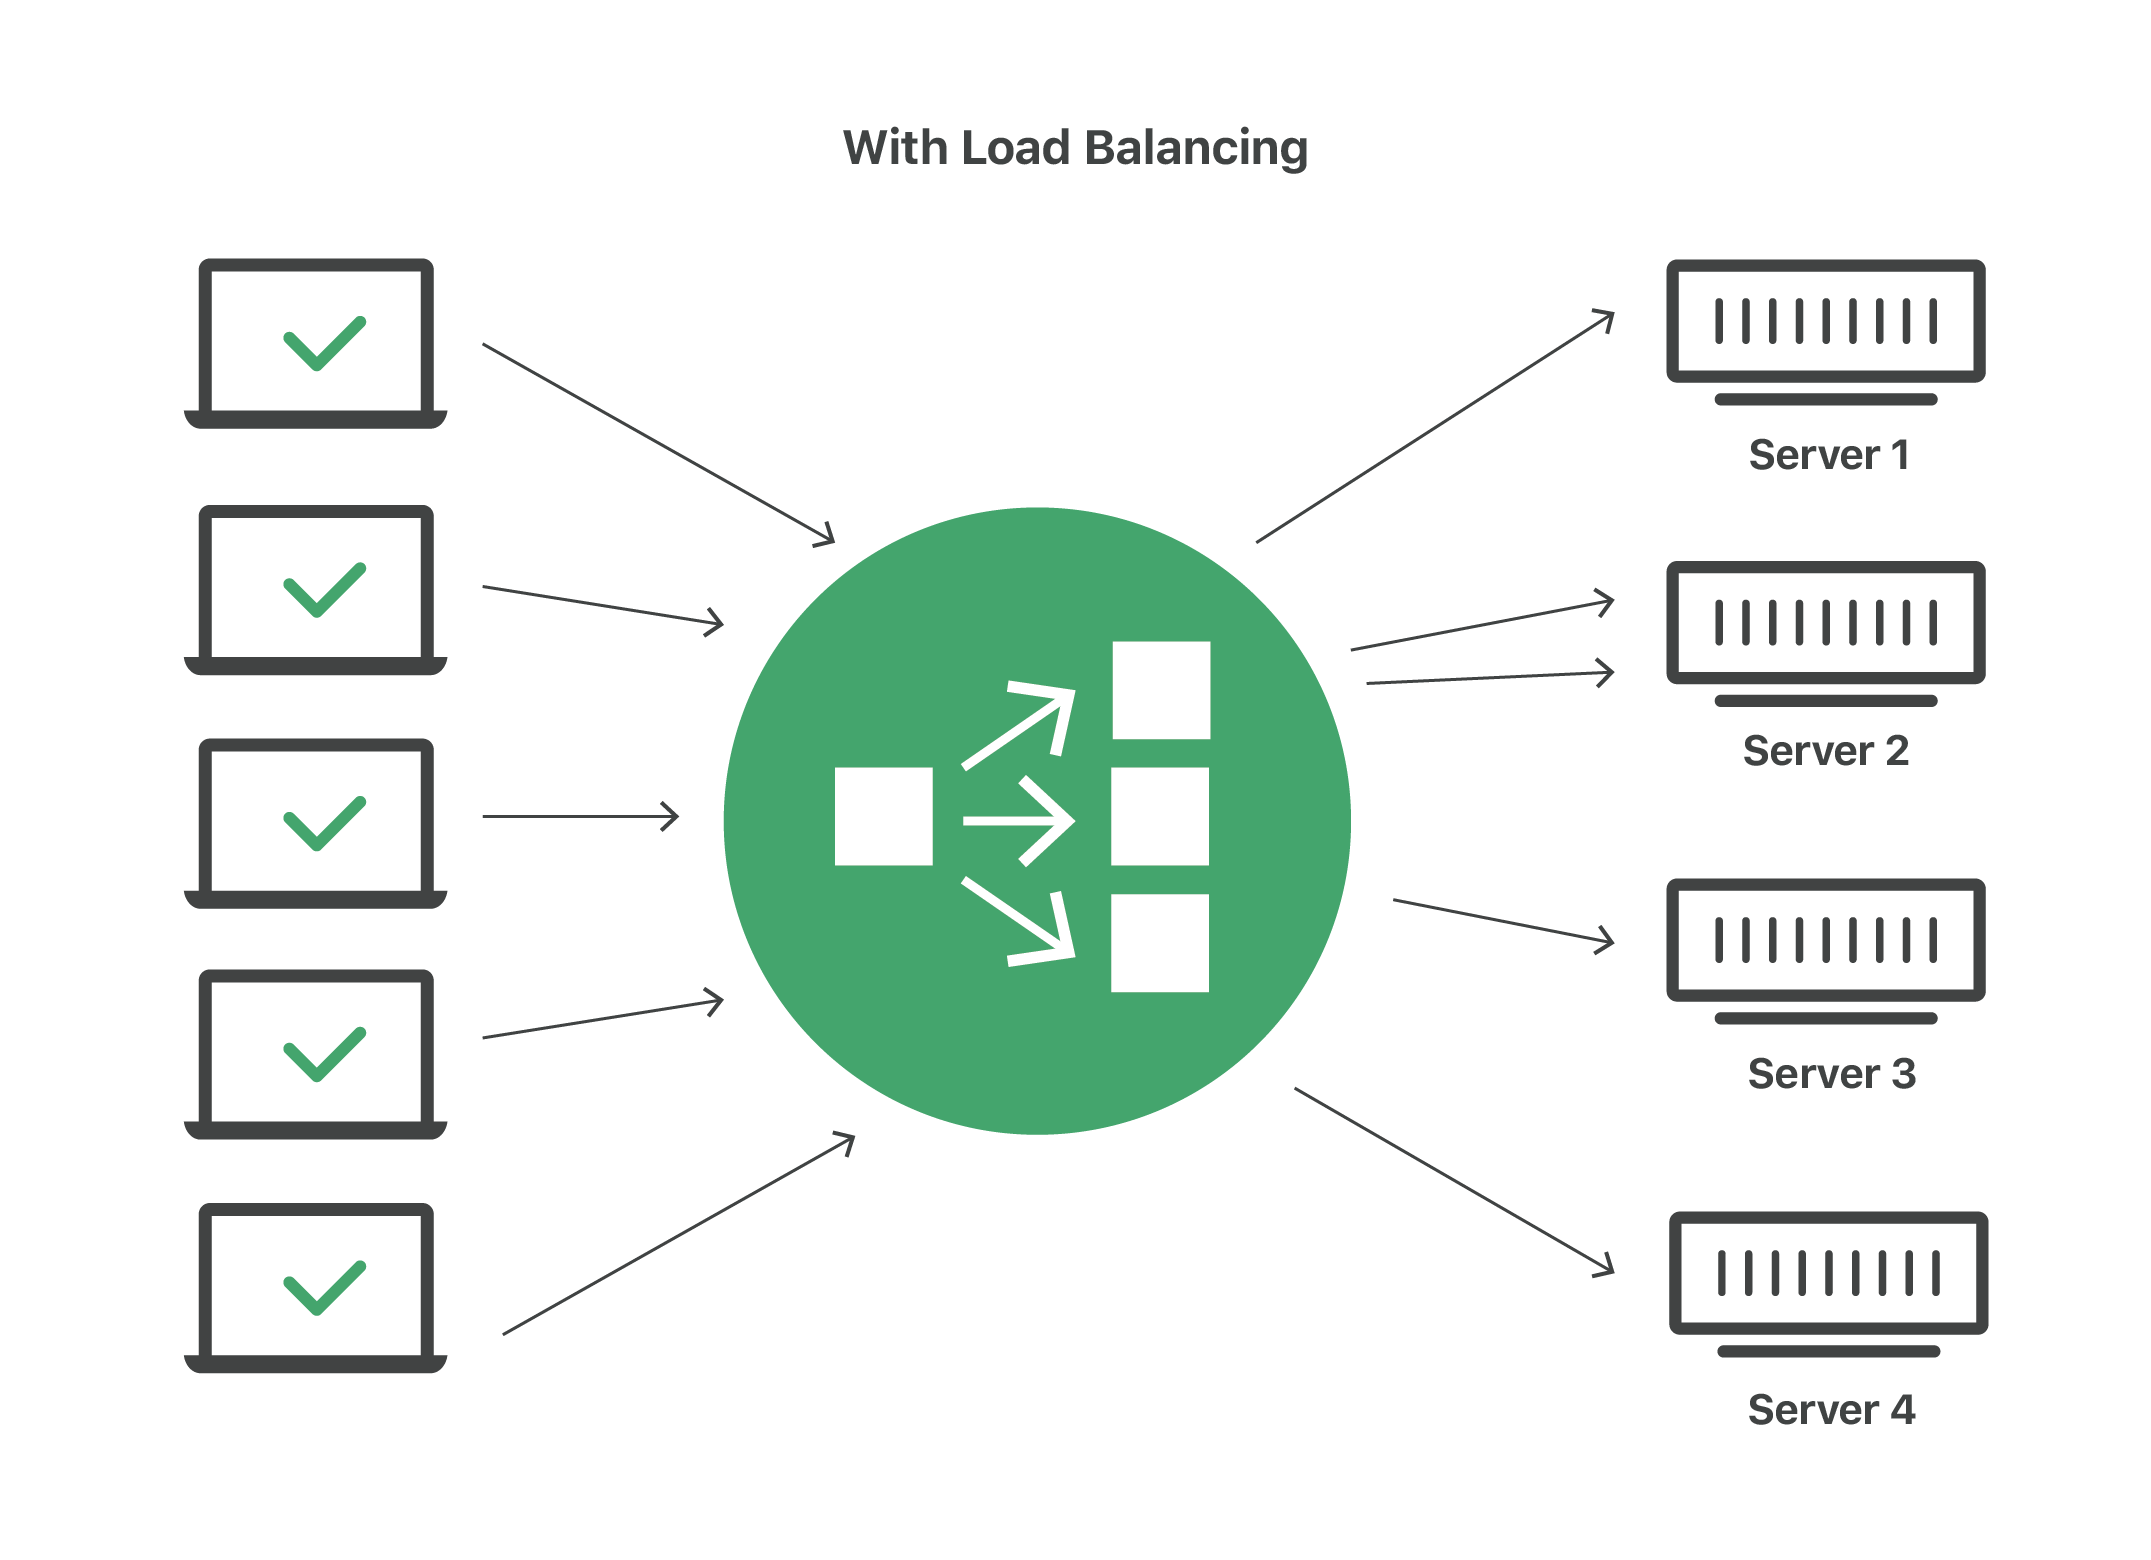
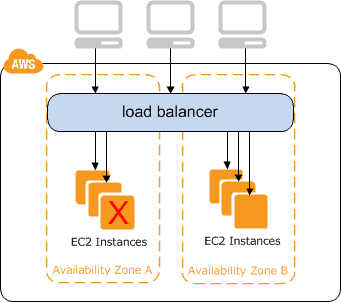
A load balancer acts as the “traffic cop” sitting in front of your servers and routing client requests across all servers capable of fulfilling those requests in a manner that maximizes speed and capacity utilization and ensures that no one server is overworked, which could degrade performance. If a single server goes down, the load balancer redirects traffic to the remaining online servers. When a new server is added to the server group, the load balancer automatically starts to send requests to it.
This reduces the strain on each server and makes the servers more efficient, speeding up performance and reducing latency. Load balancing is essential for most Internet applications to function properly.

Imagine a checkout line at a grocery store with 8 checkout lines, only one of which is open. All customers must get into the same line, and therefore it takes a long time for a customer to finish paying for their groceries. Now imagine that the store instead opens all 8 checkout lines. In this case, the wait time for customers is about 8 times shorter
How does load balancing work?
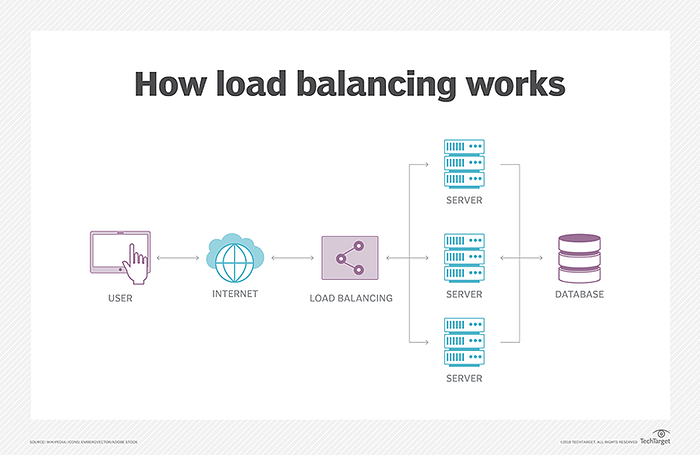
A load balancer can be either hardware-based or software-based. Hardware load balancers require the installation of a dedicated load balancing device; software-based load balancers can run on a server, on a virtual machine, or in the cloud. Content delivery networks (CDN) often include load balancing features.
When a request arrives from a user, the load balancer assigns the request to a given server, and this process repeats for each request. Load balancers determine which server should handle each request based on a number of different algorithms.

In this manner, a load balancer performs the following functions:
Distributes client requests or network load efficiently across multiple servers
Ensures high availability and reliability by sending requests only to servers that are online
Provides the flexibility to add or subtract servers as demand dictates.
AWS Elastic Load Balancing (ELB)
Amazon Web Services (AWS) is a cloud computing platform offering a wide range of services to help businesses scale their applications and infrastructure. Elastic Load Balancing (ELB) is one such service provided by AWS, designed to automate and simplify the process of load balancing.
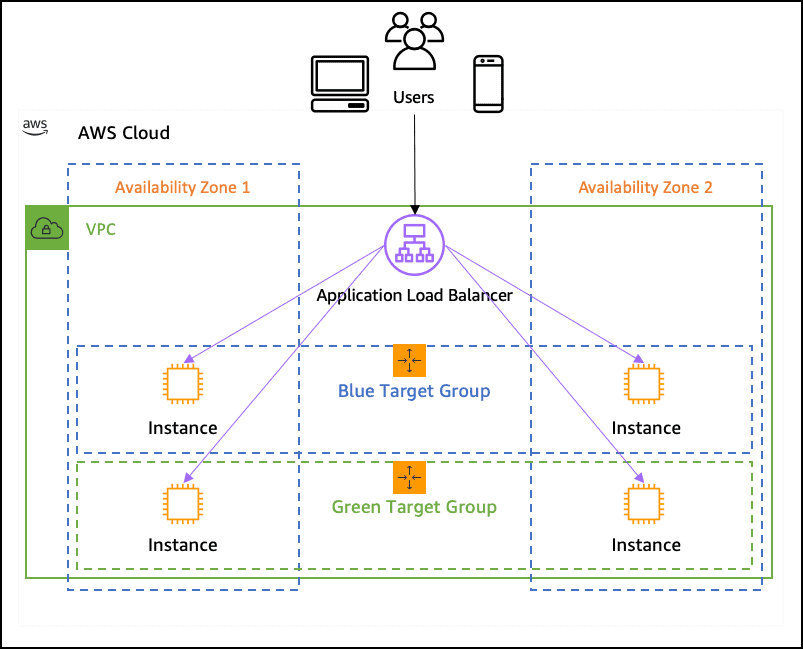
Distributes incoming application traffic across multiple targets, such as EC2 instances, containers (ECS), Lambda functions, and IP addresses in multiple Availability Zones(AZs).
Distributes Client traffic across servers and Improves the performance of applications.
It Accepts incoming traffic from clients and routes requests to its registered targets.
Monitors the condition of its registered targets and routes traffic only to healthy targets.
Types of AWS Elastic Load Balancer:
In AWS, there are three main types of load balancers available:
Classic Load Balancer (CLB):
The Classic Load Balancer is the original load balancer service in AWS. It operates at both the application and transport layers (Layer 7 and Layer 4) of the OSI model. CLB is suitable for basic load balancing needs and provides features like session stickiness, health checks, and SSL termination. However, it lacks some of the advanced capabilities available in the newer load balancers.
Application Load Balancer (ALB):
The Application Load Balancer is a Layer 7 load balancer specifically designed to handle HTTP and HTTPS traffic. ALB offers advanced and flexible routing capabilities, allowing you to route traffic to different target groups based on various conditions, such as URL path, host header, or query string. It supports content-based routing, path-based routing, and integrates with AWS services like AWS Certificate Manager and AWS WAF (Web Application Firewall).
Network Load Balancer (NLB):
The Network Load Balancer is a Layer 4 load balancer that can handle high-performance traffic, including TCP, UDP, and TLS traffic. NLB is designed for applications that require ultra-low latency and high throughput. It is capable of handling millions of requests per second and supports static IP addresses for the load balancer. NLB works with both containers and EC2 instances, making it suitable for a wide range of applications.
Benefits of Elastic Load Balancing:
High availability: The most common service that relies on Elastic Load Balancer is Amazon’s EC2 Instances, as Elastic Load Balancer performs a health checkup to confirm an instance continues to be running before sending traffic thereto. A developer can integrate Amazon Route 53 and Domain name system (DNS) failover to further boost application resiliency.
Automatic scaling: A developer can use the AWS Auto Scaling feature to ensure he or she has enough EC2 instances running behind an ELB. The developer sets Auto Scaling conditions, and when a condition is met, a brand new EC2 instance can spin up to satisfy the specified minimum. A developer also can set a condition to spin up new EC2 instances to scale back latency.
Security: AWS Elastic Load Balancer supports applications within an Amazon VPC for stronger network security. An IT team can specify whether it wants an internet-facing or internal load balancer. The latter option enables a developer to route traffic through an ELB using private IP addresses.
Traffic Distribution: ELB evenly distributes incoming traffic across multiple compute resources, such as EC2 instances or containers, to ensure that no single resource is overloaded while others remain idle. This helps optimize resource utilization.
Availability and Fault Tolerance: ELB enhances the availability of your applications by automatically detecting and routing traffic away from unhealthy or failing targets. If a target becomes unhealthy, ELB stops sending traffic to it until it recovers, reducing the impact of potential failures.
Task 1:
Launch 2 EC2 instances with an Ubuntu AMI and use User Data to install the Apache Web Server.
1. Log into your AWS Console and go to the EC2 dashboard.
- Click on the "Launch Instance" button and select "Ubuntu Server "

- Choose the instance type, configure the instance details, add storage, and configure security groups as required.


The "Configure Instance Details" page, scroll down to the "Advanced Details" section and expand the "User data" field.
In the "User data" field, enter the following commands to install and start the Apache web server:
  #!/bin/bash

  apt-get update
  apt-get install -y apache2
  systemctl start apache-2
  systemctl enableapache-2
In summary, give a number of Instance 2 and click on Lunch Instance.

You can see two instances are created.

- Copy the public IP address of your EC2 instances.
- Open a web browser and paste the public IP address into the address bar.
You should see a webpage displaying information about your installation.
Apache_server1

Apache_server2:

Modify the index.html file to include your name so that when your Apache server is hosted, it will display your name also do it for 2nd instance which include " TrainWithShubham Community is Super Aweasome :) ".
Connect Instances using SSH.
Go inside the/var/www/html path and edit the index.html file

Copy the public IP address of your EC2 instances.
Open a web browser and paste the public IP address into the address bar.
You should see a webpage displaying information about your PHP installation.

Task 2: Creating an Application Load Balancer (ALB)
Step 1: Create an Application Load Balancer
Log in to your AWS Management Console.
Navigate to the EC2 service.
In the left-hand menu, under "Load Balancing," select "Load Balancers."

- Click the "Create Load Balancer" button.

Choose "Application Load Balancer" as the load balancer type.

Configure the load balancer settings, such as name, listener, security group, and availability zones. For the listener, you can choose HTTP or HTTPS, depending on your application's requirements.


Configure "Security Groups"

Now in the Listeners and routing Section there, you find the select target group . but we don't have the Target group
- So we click on Create Target Group and it will take you to a new browser. Now you have to Select Target Type as an Instance Because we use our ec2 instance for load balancing. If you want to set with ip select that. There are 4 Target types. Now enter the Target group name.

Click on Next. you have to register targets which are your instances, select them and click on include as pending below.


Review the target and click on Create target group
Back go to the browsers Load Balancer tab and refresh the target group section and there you will find the target group that you created now select that.

There you will see the summary about the load balancer review it and click on Create the load balancer.
Now you Successfully Created a Load balancer for the EC2 instance. click on view load balancer and see the all things about your Load balancer.


Now it Its Time to test your Load Balancer. Copy the DNS name from the Load balancer Description and paste it into a new browser tab.

Thank you for giving your precious time to read this blog/article .
Happy Learning😊😊!!!!